How to clean vinyl records at home: what actually works, what damages them, and what to skip
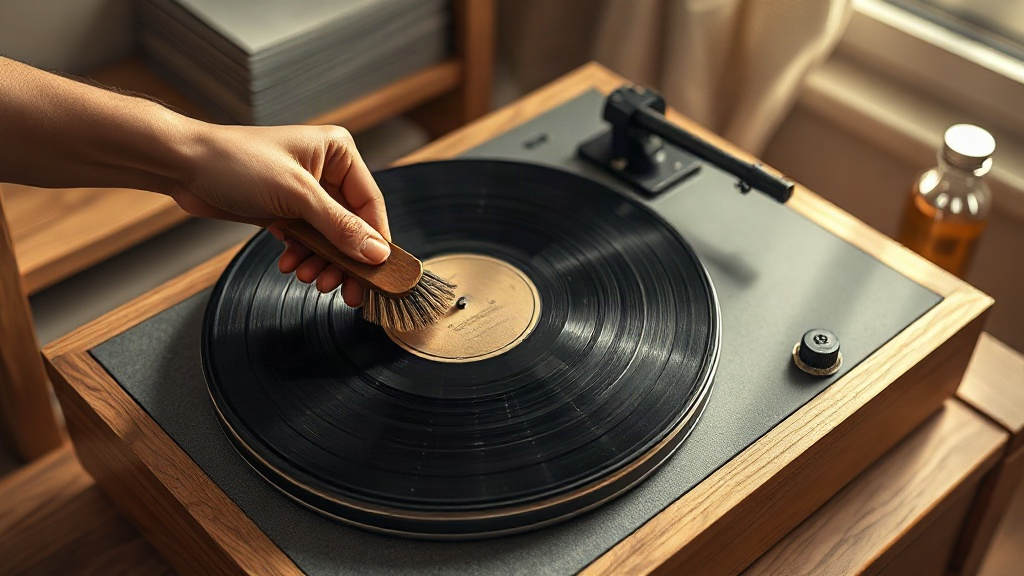
Most attempts to clean a vinyl record fall into one of two traps: either they do nothing (a surface pass that misses embedded contamination) or they cause damage (using the wrong solvent, wrong cloth, wrong brushing direction). The difference between the two comes down to knowing which type of dirt you’re dealing with before you touch the record.
As an Amazon Associate we earn from qualifying purchases. This page contains affiliate links — if you buy through them, we earn a small commission at no extra cost to you.
You put on a record and there’s the crackle. Not a dramatic skip, nothing that stops the music—just a persistent fuzz underneath the quiet passages that you can’t quite ignore. Most people assume the record itself is past it. The honest answer is usually more straightforward: the record might be fine, but something in the groove is creating friction where there shouldn’t be any. Dust, static, and the odd bit of grime are the usual suspects—and unlike a worn stylus or a warped pressing, they are problems you can fix with a brush and a few minutes.
That is the bit that matters. Cleaning your records is one of the cheapest upgrades you can make to your setup, and it doesn’t require a machine or a chemistry degree. What it does require is knowing which job needs which tool. Get that right and you will have cleaner, quieter playback. Get it wrong and you can cause the very damage you are trying to prevent. Here is what actually works.
Understanding what you’re cleaning
Before you reach for anything, it helps to understand what you are dealing with—because not all grime behaves the same way in the groove.
Surface dust is loose. It lands on the record from the air, clings to the vinyl via static, and sits on top of the groove rather than in it. It is the stuff you can often see under a light. Removing it is straightforward and, crucially, something you should do before every single play.
Embedded impurities are different. These are particles and residues that have bonded to the groove wall—from environmental contaminants, old cleaning fluids, or just years of handling without a sleeve. Once they are lodged in the microscopic texture of the vinyl, they don’t shift with a brush. They require a wet cleaning approach to dissolve and lift them out.
The reason this distinction matters is contact pressure. A stylus tip sits in a groove narrower than a human hair, tracing walls that are fractions of a millimetre wide. A single dust particle caught between that tip and the groove wall creates enormous localised pressure—enough to compress the groove or transfer material onto the stylus. Surface dust on top of the groove is relatively harmless. The same particle ground into the groove wall is the difference between a quiet record and one that wears out your needle faster than it should.
Think of it like a carpet. Dust on the surface is easy to hoover off. Dirt ground into the fibres needs a proper clean. Your records work the same way.
Your daily routine
For the majority of listeners—and this covers almost everyone with a modest setup—a dry carbon-fibre brush is the only tool you need for regular use. Run it from the label towards the edge of the record, following the direction of the groove. Never brush side to side. The fibres lift loose dust and, more importantly, drain static charge that would otherwise pull airborne dust straight back onto the surface the moment you pick the record up.
The Pro-Ject Brush IT (paid link) is designed for exactly this — small, easy to keep by the turntable, and made for quick pre-play dust removal that can reduce pops and crackle without any fluid or setup involved. The caveat is that it doesn’t catch everything in a single pass, and it won’t deal with anything that has already worked its way into the groove. That is fine. That is not its job. Its job is the preventative layer—removing surface dust before it accumulates and bonds to the stylus, which is where the real damage happens.
See Pro-Ject Brush IT on Amazon → (paid link)
A brush like this takes seconds to use, costs very little, and sits by your turntable without any mess or preparation. That is the daily habit worth building. If you do nothing else, do this before every side.
If you are building that habit, it helps to have a clear checklist of what to include in your routine. Get the Free Record Care Checklist — it covers the daily brush, the stylus check, and the storage habits that prevent most problems before they start.
Deep cleaning: when to go further
Here is where the decision gets clearer once you understand the two-type framework above. A record cleaning machine—whether a manual spinner like the Spin Clean (paid link) or a mid-range unit like the Okki Nokki ONE (paid link)—is designed for wet cleaning. That means dissolving and extracting embedded impurities that have worked their way into the groove. It is a deep clean, not a pre-play prep step.
View Okki Nokki ONE on Amazon → (paid link)
So when do you actually need it? When dry brushing has already been done, you have played the record, and the crackle is still there. If the surface is clean but the sound hasn’t improved, the problem isn’t surface dust—it is something stuck in the groove that needs a proper wet clean to shift.
The Spin Clean system is one of the better-known budget routes into wet cleaning—simple, manual, and effective for lifting visible grime that dry brushing alone cannot shift. The honest caveat is that it won’t restore a badly damaged pressing to mint condition, and the drying cloths need replacing regularly if you are working through a batch.
View Spin Clean on Amazon → (paid link)
The Okki Nokki ONE features a vacuum system that pulls fluid and dissolved grime off the record. The trade-off is time and effort: it is a manual process, it takes longer than a quick brush, and you cannot rush the drying. For someone with a serious collection of used vinyl, that is a reasonable ask. For someone who plays a few records at the weekend, it is probably overkill.
The short version is this: if your records are quiet after a dry brush, you don’t need a machine. If they aren’t, that is when it becomes worth considering. The machine is a one-off deep clean for records that need it—not a replacement for the brush you use every time.
Common mistakes that cause damage
Cleaning methods get most of the attention, but handling does more damage than most people realise. The single biggest rule is straightforward: never touch the playing surface. Pick up a record by its edge, or by the label. The oils from your fingers transfer onto the vinyl, attract dust, and create exactly the kind of contamination that leads to crackle.
On the fluids side, only use products specifically designed for vinyl. Household cleaners, washing-up liquid, or tap water can leave residue or affect the vinyl surface in ways that are hard to reverse. Record-safe cleaning solutions are formulated to dissolve grime without damaging the medium—it is a small cost for peace of mind.
One mistake worth naming: using the same brush for both the record and the stylus. It seems efficient, but it is a fast way to transfer debris from the record groove onto the cartridge tip, where it causes tracking issues and wear. Keep them separate.
Also, don’t press hard with a brush. The fibres do the work. Forcing it risks driving dust deeper into the groove rather than lifting it out, and on cheaper brushes with plastic housings, angling wrong can scratch the label edge or the vinyl surface near it.
Keeping your stylus clean
The stylus is the bit that actually reads your record. If it is clogged with debris from the groove, nothing else matters—you are playing dirty regardless of how clean the vinyl is. Yet it is the part most owners never touch.
Use a dedicated stylus brush or gel. Not a record brush. The stylus tip and cantilever (the tiny arm holding the tip) are fragile enough that the wrong approach can damage them permanently. Don’t start the turntable while cleaning the stylus, and brush from rear to front only—never side to side. That last point bears repeating because it is a common and costly mistake. Sideways pressure on the cantilever can bend or misalign it, and once that is done, the only fix is a replacement cartridge.
For the cleaning motion: lower the stylus gently onto a stylus gel and lift it straight off. Repeat a few times. It’s a quick job and makes a measurable difference to tracking clarity. The Pro-Ject Clean IT (paid link) is designed for this kind of daily maintenance, though its small size may not suit all cartridge designs, particularly if your tonearm sits low.
Check Pro-Ject Clean IT price → (paid link)
The stylus doesn’t need cleaning every time you play. What it does need is a check when you notice distortion in the sound—a slight warble, a loss of high-end detail, or crackle that wasn’t there on other records. That is usually the needle telling you it needs attention.
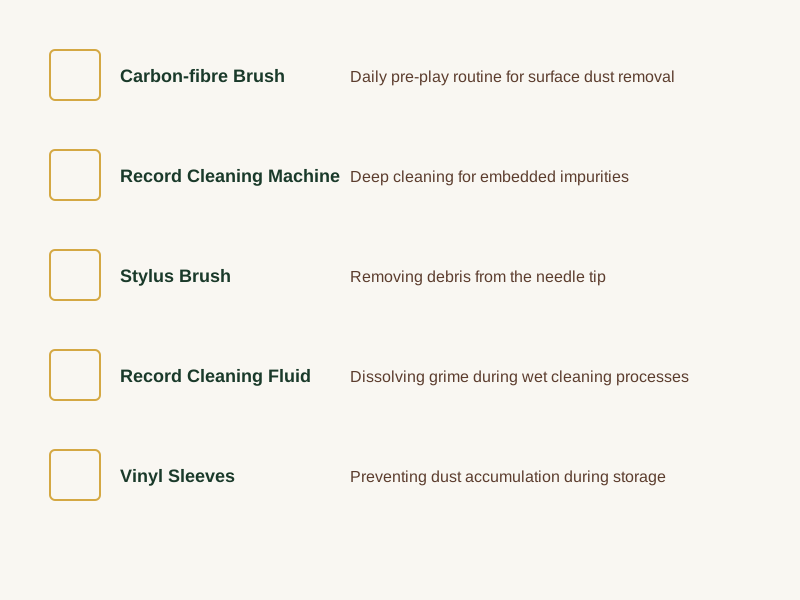
The essential tools for record care include a carbon-fibre brush for daily surface dust removal, a record cleaning machine for deep cleaning embedded impurities, a stylus brush or gel for cleaning the needle, record cleaning fluid for dissolving grime, microfibre cloths for drying records after a wet clean, and quality vinyl sleeves for storage protection.
Questions we hear often
Can I use tap water to clean my records?
No. Tap water can contain minerals and other compounds that may leave residue on the vinyl surface. Use a record-safe cleaning fluid or a purpose-made solution — a dedicated fluid like Spincare’s is designed to evaporate cleanly rather than leave deposits behind. Household liquids, even diluted, risk causing more problems than they solve.
Will a carbon-fibre brush remove all the crackle?
It will remove crackle caused by surface dust and static. If the crackle persists after a proper dry-brush session and a subsequent play, the problem is likely embedded impurities in the groove—that is when a wet clean becomes relevant. A brush handles the surface. It doesn’t fix what is already bonded to the groove wall.
How often should I clean my stylus?
Clean the stylus when you notice distortion in playback or after you have played a particularly dirty record. For regular use, checking every few sessions is reasonable. Use a dedicated stylus brush or gel, not the record brush, and always brush rear to front.
Is a record cleaning machine worth the money?
For casual listeners with a small, well-maintained collection, no—a carbon-fibre brush and good sleeves are sufficient. For owners with large collections, used vinyl, or records that still crackle after dry brushing, a cleaning machine can make a genuine difference. The Spin Clean is one of the better budget entry points into wet cleaning. If your collection is large and you are cleaning dozens of records at a time, something like the Okki Nokki ONE has the extraction power to justify the step up in cost.
Building your cleaning schedule
Before every play: Use a carbon-fibre brush to remove surface dust and static.
After every ten plays or so: Check your stylus with a dedicated brush or gel, especially if you notice any sound degradation.
Once a year, or when you buy used records: Consider a wet clean for records that still exhibit crackle after your regular brushing. This is when a machine or deep-cleaning kit earns its keep.
The mechanism behind quiet playback is simpler than most people realise. Surface dust and static are the daily enemy—the things that accumulate with every play and every handle. A quick dry brush before each side keeps those under control, costs almost nothing, and prevents the stylus from carrying debris back into the groove on every rotation. That is the habit worth building.
Embedded impurities are a separate job. They need a proper wet clean, and they need it only when the dry brush hasn’t solved the problem. That is the moment to consider a cleaning kit or machine—not before, and not every time.
What separates a clean record from a noisy one is rarely the equipment you throw at it. It is the understanding of which tool does which job, and the discipline to do the small things consistently. The brush before the play. The sleeve after. The stylus checked when the sound goes off.
Those three things will do more for your listening than any upgrade you could buy. If you want a written reminder of the routine to keep by your turntable, the checklist covers exactly that. Get the Free Record Care Checklist .
Explore More Topics
Quick answers:
Go deeper on specific topics:
- Is a record cleaning machine worth it? What a home collector actually gets for the money
- Can you wash a vinyl record with soap and water? What’s safe and what isn’t
- Isopropyl alcohol on vinyl records: safe, or a myth that keeps getting repeated?
- Carbon-fibre brush, spray or wet clean: which method your records actually need
- Do new records need cleaning before you play them?
- Cleaning charity-shop and second-hand records before their first play
- Mould on vinyl records and sleeves: what you can rescue and what to bin
Sources & Further Reading
As an Amazon Associate we earn from qualifying purchases. The products linked above are ones we recommend based on independent research and owner feedback.
Note: General guidance only, verify details with a qualified professional or official source.