Can you wash a vinyl record with soap and water? What's safe and what isn't

Soap-and-water cleaning is a degreasing technique, so the first question is whether the record’s contamination is actually greasy. Most household records aren’t—they’re dusty, or they carry the mould-release compound from the pressing plant, or they’ve picked up fingerprints. For those, a simple brush often does the job. But when you’re dealing with charity-shop finds or records that have been handled repeatedly, the problem shifts to skin oils and stubborn grime that dry methods can’t lift. That’s where soap-and-water enters the picture, and the risks change accordingly.
The short version is this: plain water—even tap water—won’t melt your record or damage the vinyl. What damages playback is what water leaves behind when it dries. Get that right and the soap question becomes straightforward. Get it wrong and a well-intentioned wash can leave more crackle than you started with. This article explains exactly what separates the safe method from the one that creates a problem you will hear on every rotation.
How water interacts with vinyl grooves
Vinyl is chemically stable. It will not swell, warp, or dissolve because you got it wet—that is not the mechanism that ruins a record. The mechanism is residue: whatever is in the water stays in the groove when the record dries, and the stylus then rides through that residue on every play. That is what you hear as crackle, what makes the groove walls sticky to dust, and what compounds over multiple plays.
When guidance says a few drops of dish soap in distilled water is acceptable, the logic is not that soap is somehow good for vinyl. It is that the soap helps flush grime out of the groove, and if the water itself leaves nothing behind when it evaporates, you have done the record a favour. The risk with tap water is the mineral content—dissolved calcium, magnesium, and other salts that do not evaporate with the water and concentrate on the groove surface as a white film [Source: The Vinyl Factory]. The risk with too much soap is surfactant residue doing the same thing.
Cleanliness depends more on the water’s purity and the thoroughness of rinsing than on the soap itself.
Why tap water creates problems
If you wash a record under a running tap and let it air-dry, you will leave mineral deposits on the surface. The amount is small—you won’t necessarily see it—but over repeated plays it accumulates, and the stylus will register it. This is a slow process, which is probably why it doesn’t come up more in forum threads. The record sounds slightly worse after each wash until someone blames the stylus, the cartridge, or the tracking force. The tap water is doing something visible in slow motion.
Distilled water—the kind sold for steam irons and car batteries—evaporates without leaving anything solid behind. It is not expensive: a one-litre bottle from a petrol station or supermarket is typically under £1 [Source: UK supermarket pricing]. Using it costs nothing meaningful against the price of a record worth cleaning.
The practical implication is simple: the water you use for the wash and the water you use for the rinse should both be distilled [Source: Hi-Fi Choice]. That is the entire difference between a record that comes out cleaner and one that comes out slightly worse than when you started.
Step-by-step cleaning process
A few drops of mild dish soap in distilled water is a method accepted by many record-care guides. The principle is straightforward—enough soap to break up grease and grime in the groove, not so much that it leaves its own residue behind. A few drops in a bowl or washing tray is plenty. You are not making a bubble bath.
What follows is the sequence that matters:
- Work in the direction of the groove—radially, from the label outward—not in circles. Circular wiping follows the groove path and can trap debris rather than lifting it out. Radial cleaning moves across the groove walls.
- Rinse thoroughly with clean distilled water. Any soap left behind becomes residue, and the whole point of the rinse is to eliminate that. One rinse may not be enough if the record was heavily soiled. A second pass with fresh distilled water is cheap insurance.
- Dry with a microfibre cloth or a clean, lint-free equivalent. Pat or drag lightly across the surface—don’t scrub. The record needs to be fully dry before it goes back on the platter; a damp record and a felt mat do not end well.
- No water on the label. Ever. The paper absorbs it, the adhesive softens, and you have introduced a problem that cleaning cannot fix. Hold the record by the edge and keep the label clear of everything wet.
Those who report good results from soap and water have usually followed this process carefully. Failures typically involve too much soap, skipped rinsing, tap water, or label contact—not the method itself.
Practices to avoid completely
Some approaches keep appearing in forum advice despite clear risks.
Household cleaning products—bleach, kitchen spray, anything with fragrance or additives—are not designed for a surface this specific. They can leave their own residue, affect the vinyl’s surface properties, or interact with any printing on the label. There is no reason to use them on a record.
Undiluted dish soap applied directly to the record surface will leave more surfactant behind than a diluted wash. A few drops in a bowl of water is the method; a blob of neat detergent is not.
Air-drying in a cold or humid space without air movement means the record sits damp for longer than it should, which gives time for whatever is in the water to settle. A few minutes with a microfibre cloth and a room-temperature space with some air movement is the target.
Wet cleaning a record that has a deep scratch or a chip in the groove is a case where water or fluid can get into the damage and stay there, potentially causing more audible change than the cleaning solves. For records with physical damage, a dry carbon-fibre brush before each play is the kinder approach.
Comparing cleaning approaches
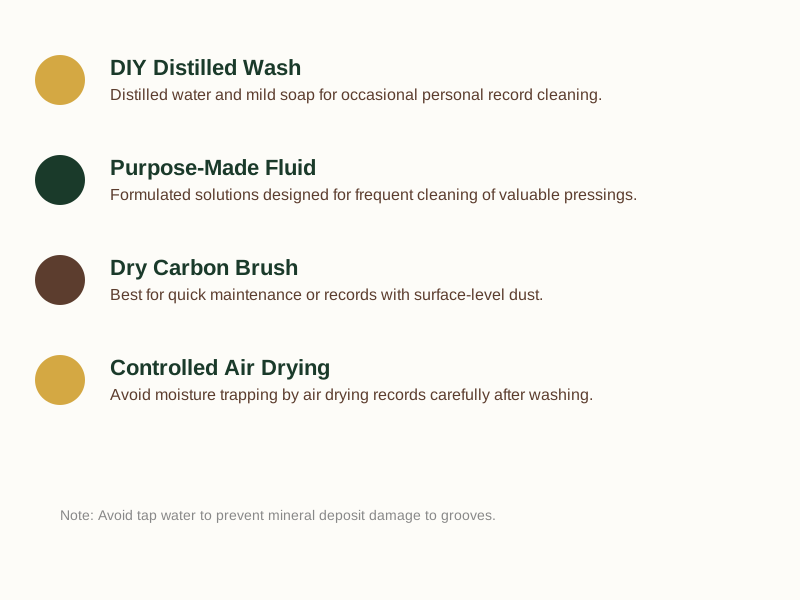
| Method | Water Type | Soap | Residue Risk | Best For |
|---|---|---|---|---|
| DIY Distilled Wash | Distilled | Mild dish soap | Low | Occasional cleaning of personal records |
| Tap Water Wash | Tap | Mild dish soap | High | Not recommended due to mineral deposits |
| Purpose-Made Fluid | Distilled | Formulated solution | Low | Frequent cleaning or valuable pressings |
| Dry Carbon Brush | N/A | N/A | None | Quick maintenance or records with deep scratches |
| Air Drying | N/A | N/A | Medium | Risk of moisture trapping if not done carefully |
When commercial fluids make sense
UK retailers list record-cleaning fluids starting from around £8.99 [Source: HMV, Richer Sounds]. For someone with a modest collection of personal-use records, the DIY distilled-water method is adequate and costs almost nothing once you have the bottle of distilled water. If you’re cleaning a low-value find, spending significantly on a cleaning fluid might not make economic sense.
Purpose-made fluid earns its place in two situations. First, if you clean dozens of records monthly—perhaps as a regular buyer of used vinyl—a dedicated fluid used with a cleaning machine or tray offers more consistency than mixing fresh solution each time, and the cost per record decreases with volume. Second, for valuable pressings, spending on a proper fluid and using it carefully provides insurance against errors that can occur with rushed DIY washing.
The fluid itself is not magic. The mechanism is the same—fluid, agitation, rinse, dry. What a quality product offers over a DIY mix is a known concentration, a formulation tested for minimal residue, and instructions calibrated for the specific application. For occasional cleaning of personal records, this may be unnecessary, but it doesn’t make the DIY approach wrong.
Success with any cleaning method depends more on careful execution—thorough rinsing and complete drying—than on the specific product used.
Check your stylus first
One aspect cleaning discussions often overlook is that a dirty stylus will make a clean record sound terrible. If you clean a record and the crackle does not improve, the stylus is the next thing to check—not the cleaning method. This is worth knowing because many people cycle through cleaning products and machines while the stylus itself remains coated with the same grime that was on the record. Cleaning the record before addressing the stylus is like putting clean plates on a dirty shelf.
Making the right choice for your records
The genuine case for soap-and-water cleaning is heavily-soiled second-hand records where grease is part of the problem. For new records or those with only dust contamination, it’s often unnecessary—and introduces risks that dry cleaning avoids. If you’re dealing with mould or unknown residues from long-term storage, our guide on cleaning second-hand charity shop records covers specialised approaches.
The distilled-water method with mild soap works when executed carefully. What makes it unsafe isn’t the water; it’s the residue left behind, which means tap water, excessive soap, and incomplete drying are the actual failure points. A £1 bottle of distilled water and a clean microfibre cloth will do more for a dirty record than an expensive fluid used carelessly.
If you’ve been hesitant to clean a record because online advice was confusing, the method above clears the safety bar without needing specialist equipment. Clean the stylus first if you haven’t already—that’s the simple check that comes before anything else.
If you’re establishing a cleaning routine and want a straightforward checklist to follow before every wash, the free resource below covers exactly that.
Ready to implement a safe cleaning approach? Get the Free Record Care Checklist to maintain your records properly.
Related Guides
For comprehensive cleaning methods, see our How to clean vinyl records at home: what actually works, what damages them, and what to skip .
Sources & Further Reading
This guidance is for general information. Always verify specific cleaning products and techniques with manufacturer recommendations.